Billing & payments
Invoice schedule & invoices
Invoice schedule
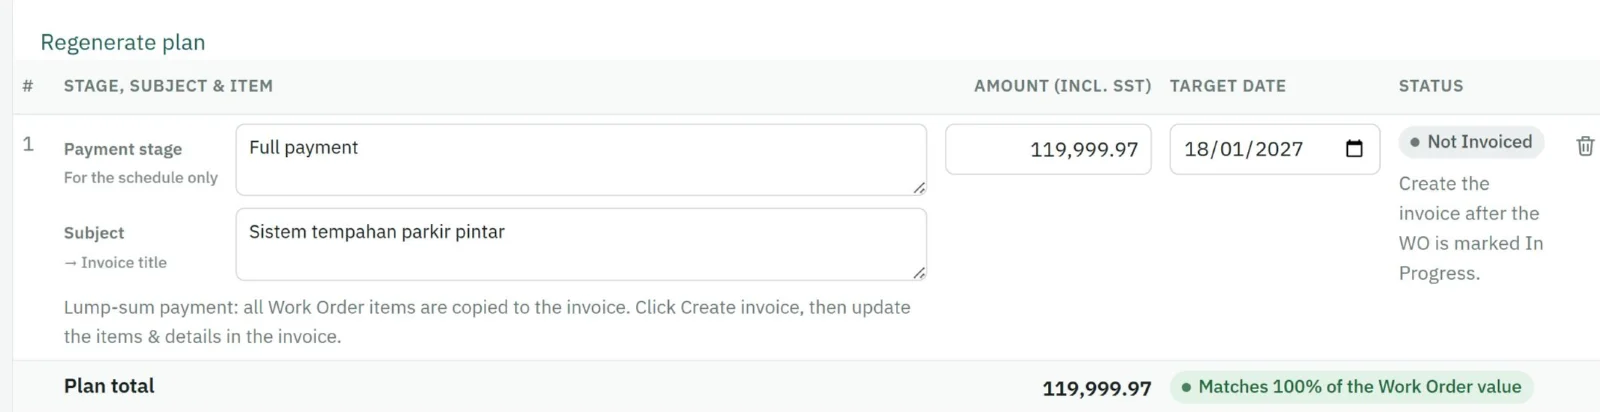
Each work order has an invoice schedule — the billing plan. Split the contract monthly, quarterly, yearly, by milestone or as one lump sum, with a title, amount and target date for each line.
- Under Generate plan, choose the type: Lump sum, Monthly, Quarterly or Yearly.
- For a lump sum, pick the date. For instalments, enter the number of payments and the start date.
- Press Generate. The amount is split evenly (any cents go to the last line). Adjust titles, amounts or dates if needed, then Save.
For milestones, add the lines yourself instead. Once a plan exists the generator is hidden behind Regenerate plan — use it only to rebuild the lines that have not been invoiced yet; invoiced lines are never touched. When everything has been invoiced, the generator disappears.
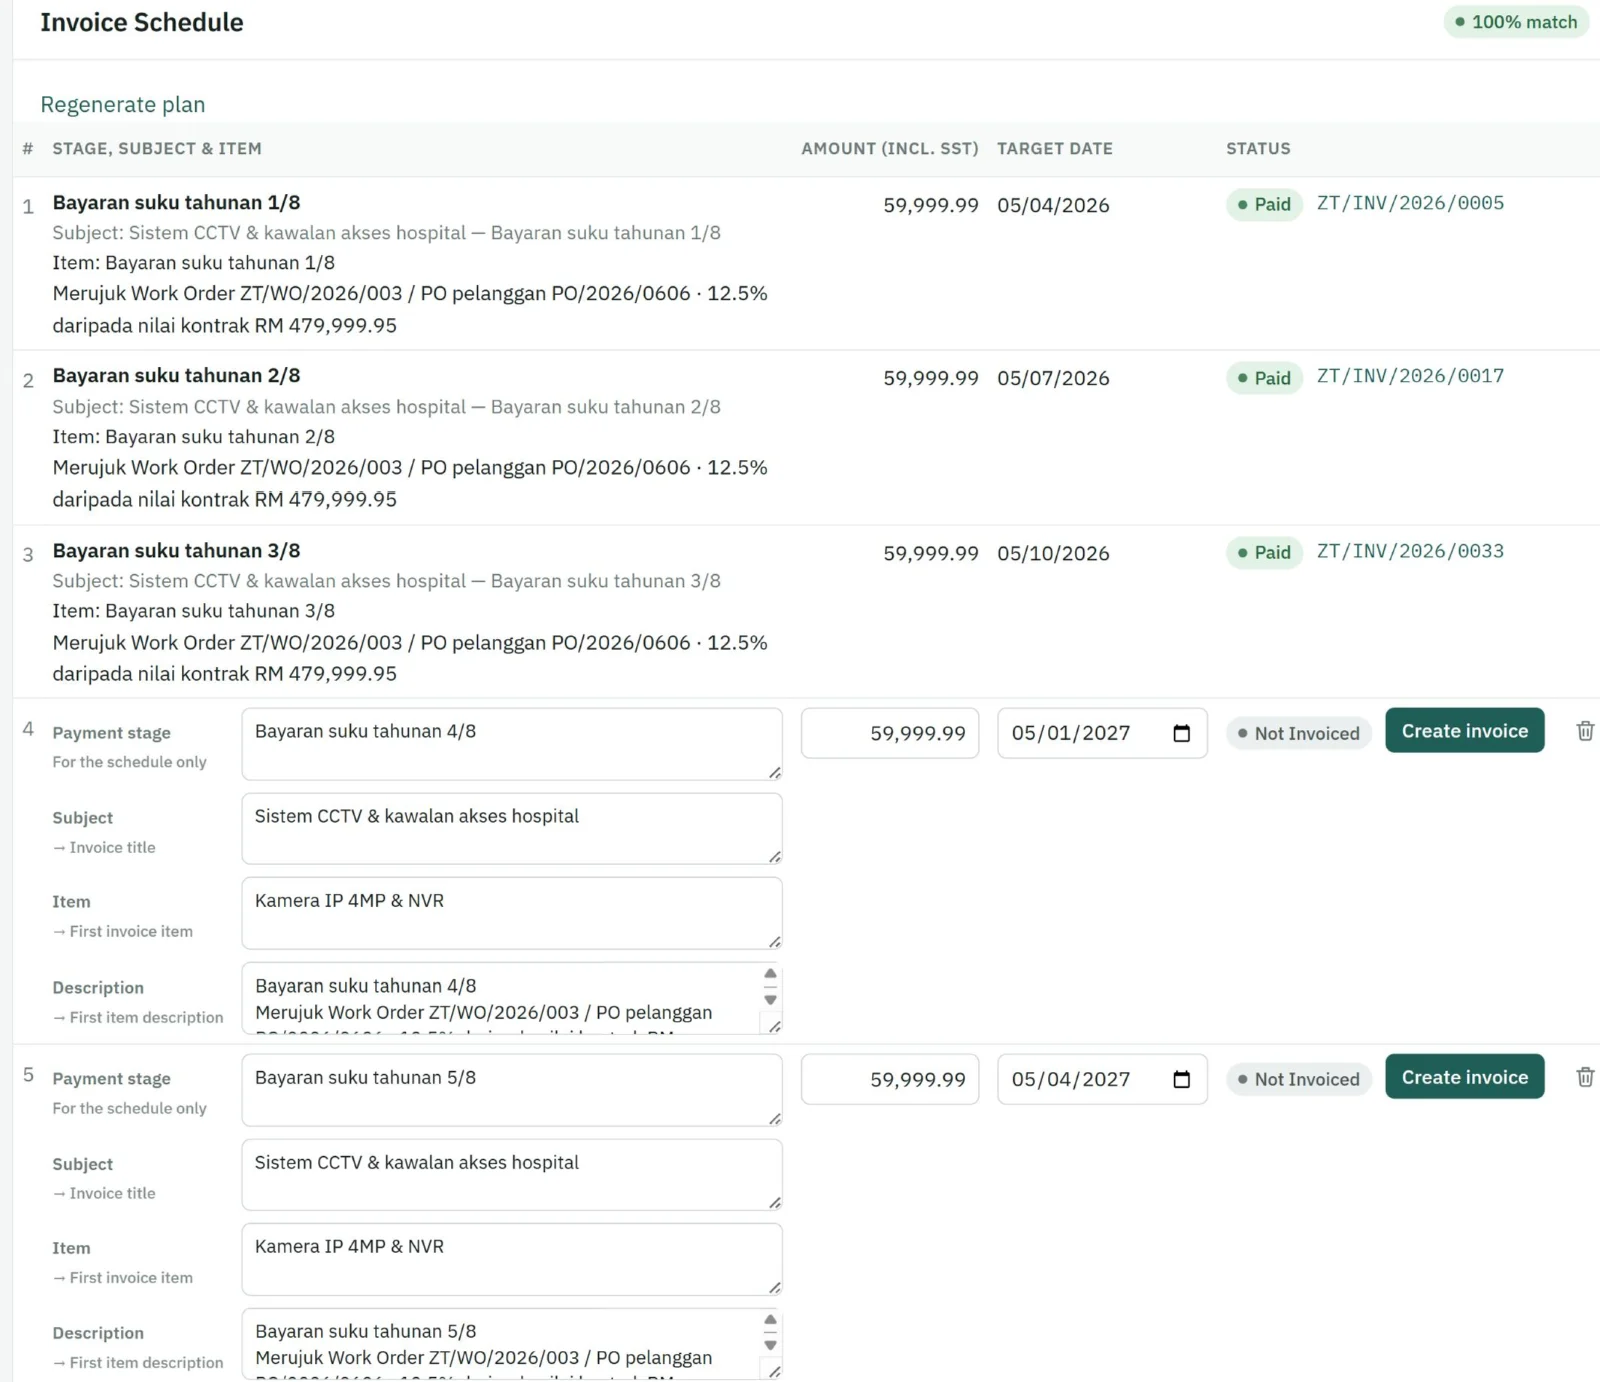
What each field becomes on the invoice. Every schedule line has these text fields, in this order. They are filled in with the usual values already, so you only edit what needs to change. The small note under each label shows where it goes:
| Field | On the invoice |
|---|---|
| Payment stage | For the schedule only, e.g. "Payment 2 of 4". |
| Subject | The invoice title (filled in with the work order title). |
| Item | The name of the first invoice item (filled in with the first work order item). |
| Description | The description of the first invoice item. It is filled in with the payment stage and, on the next line, a reference to the work order, customer PO and the percentage of the contract value, e.g. "Payment 2 of 4" then "Ref. Work Order ZT/WO/2026/030 / Customer PO 4500012345 · 25% of contract value RM 120,000.00". Replace it with your own text if needed, e.g. "Maintenance for the first quarter, year two". |
Item and Description only cover the first item of the invoice. Other work order items are still copied to the invoice at the same percentage; extra items are added in the invoice itself.
Once a line has an invoice, it is locked and shows the invoice's current title, first item and its description. If you change them in the draft invoice, the schedule shows the new text. To change a locked line, void its invoice first.
The status of each line follows its invoice: Not invoiced; while the invoice is in progress, its actual status — Draft, Pending approval or Rejected; then Invoiced, Partially paid and Paid.
Creating an invoice
- Save the schedule first, then on a schedule line click Create Invoice. The button appears once the work order is marked In Progress; before that the line says so. Customer, PIC and the items are filled in from the work order; the title, first item and its description come from the schedule line.
- The due date is calculated from the customer's payment terms; SST is applied per item. Your SST number and bank details are printed on the invoice.
- Need more than one item, or a different amount? While the invoice is still Draft, click Edit — see Adding items to an invoice below.
- Submit for approval. After approval the invoice is Issued, locked, and can be downloaded as PDF or emailed to the customer's PIC.
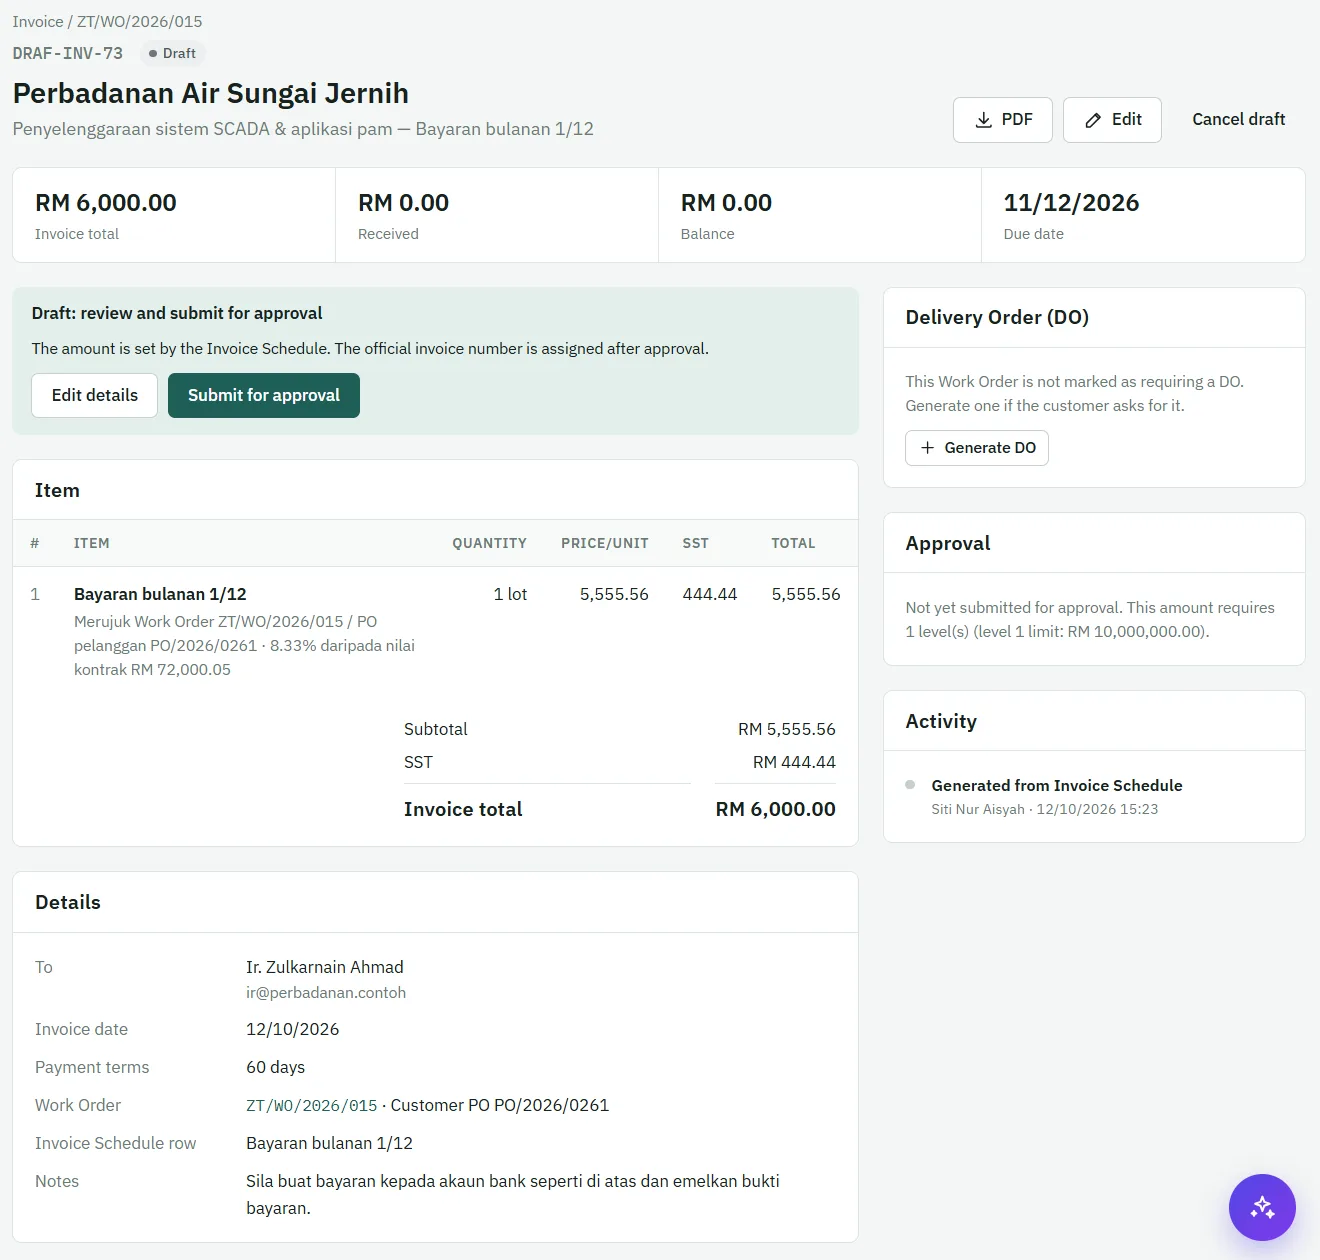
Statuses: Draft → Pending approval → Issued → Partially paid → Paid (or Rejected, Void). Payment statuses update automatically from receipts.
Adding items to an invoice
An invoice created from the schedule starts with the work order items: for a lump sum, a copy of all of them; for a staged payment, each item at the schedule line's percentage, with the first item taken from the schedule line's Item and Description. To change or add items:
- Open the invoice and click Edit.
- In the item list, change the item, quantity, price or SST code, or click Add item for each extra line.
- Save. The subtotal, SST and invoice total are recalculated.
When you can do this: only while the invoice is Draft, or after it has been Rejected by the approver. Once it is submitted for approval or issued it is locked — to change an issued invoice, void it (if no payment has been received) and create it again.
An invoice must always keep at least one item.
If the invoice total changes
If your edits make the invoice total different from the amount on its schedule line:
- The schedule line follows the invoice. Its amount is updated automatically to the new invoice total, and the change is recorded in the audit log.
- The schedule may no longer add up to 100% of the work order value. Adjust the remaining schedule lines so the total matches again — otherwise the work order keeps showing the warning, and the cash flow projection uses the changed amounts.
- The approval level follows the new total. A higher amount may need a higher approval level.
- The contract summary on the invoice shows the work order value, what was invoiced before, this invoice and the remaining balance, so you can see the effect before submitting. You can also hide it from the PDF — see Scope of work & contract summary.
Scope of work & contract summary on the PDF
When an invoice bills only part of a work order (for example one month of twelve), its PDF can show a box with the scope of work — the work order's items — and a contract summary: contract value, amount invoiced before, this invoice and the remaining balance.
- It is shown by default. To hide it, open the invoice, click Edit and untick Show "Scope of work & Contract summary" on the PDF, then save.
- Hide it when the totals could confuse the customer — for example when you have added items or changed amounts, so the final contract total is no longer the original work order value.
- Like other edits, it can only be changed while the invoice is Draft or Rejected. It only affects the PDF; the invoice amounts are not changed.
- An invoice that bills the whole contract at once never shows the box.
Receipts & supplier payments
Receipts (customer payments)
- Under Payments, record the date, method, bank reference, amount and which invoices it settles.
- A payment can be partial, or cover several invoices at once.
- Invoices and their schedule lines become Partially paid or Paid automatically.
- Download an official receipt PDF if needed. A receipt recorded in error can be voided with a reason.
Supplier payments
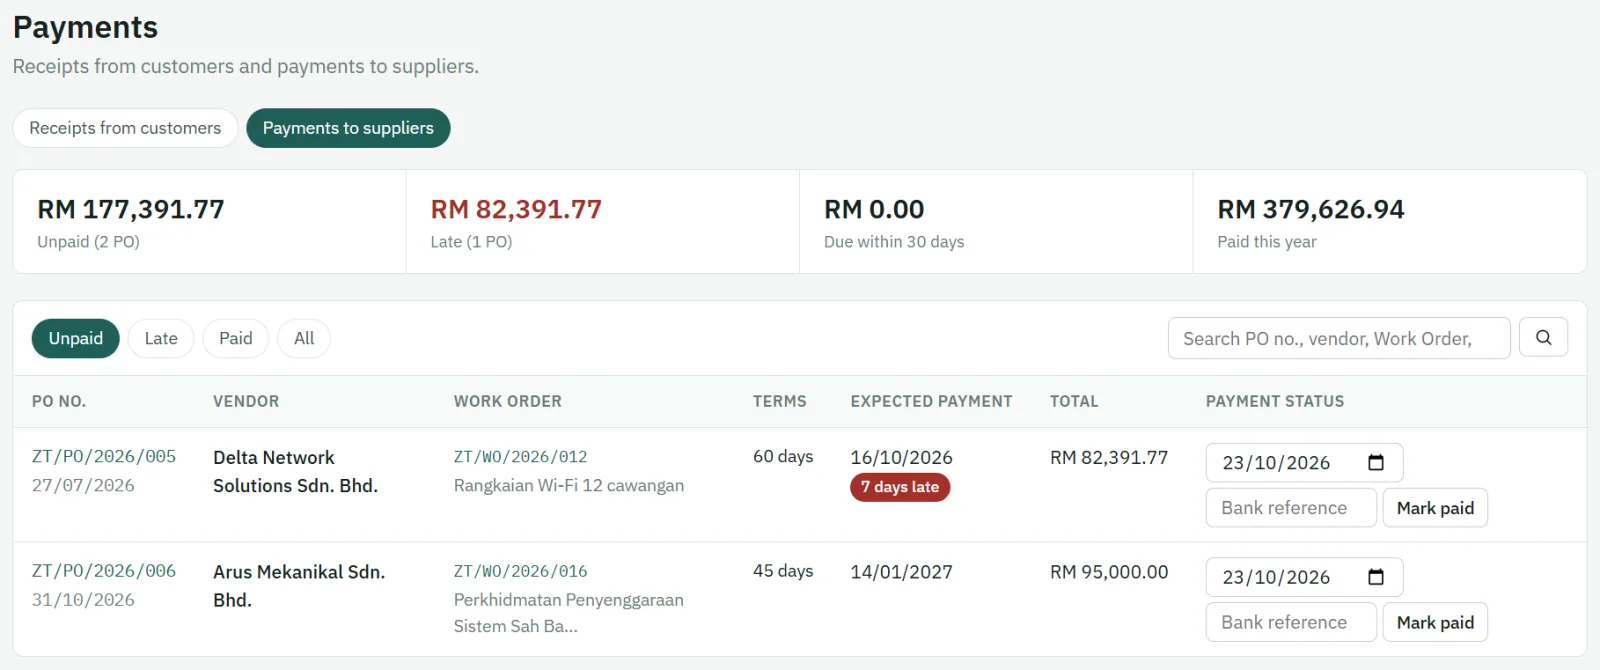
Under Payments to suppliers, record what you have paid against vendor POs. The Dashboard reminds you of vendor POs not yet paid.